My Account Settings Page
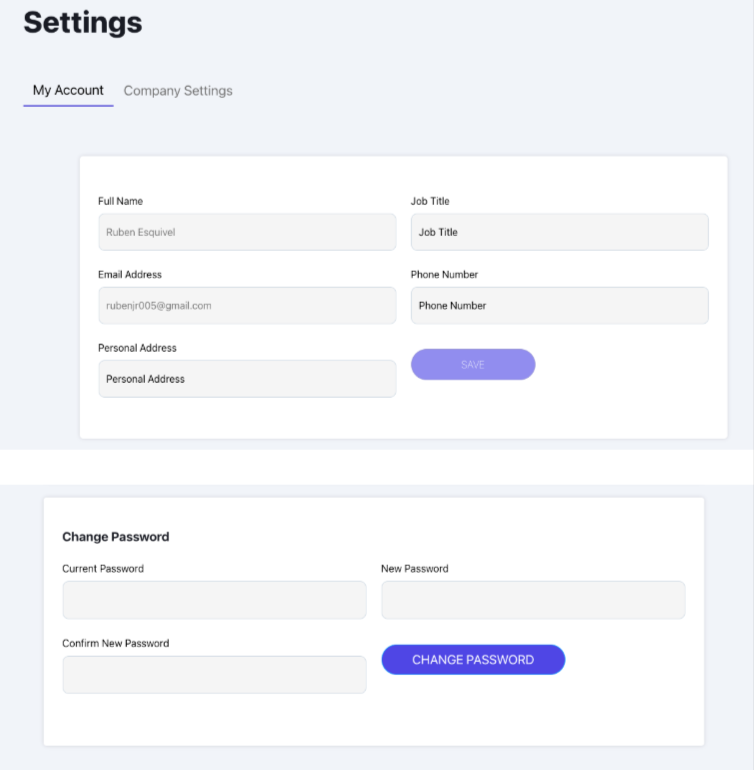
My Account Settings
In this section, users can update their personal details, such as full name, job title, email address, phone number, and personal address. This area also includes the option to change the account password by entering the current password and the new desired password.
The Benefit
The Account Settings section provides a simple and convenient way for users to keep their information current and secure. The ability to change the password directly from this page adds an extra layer of security, ensuring users can quickly update it as needed without assistance.
Company Settings Page
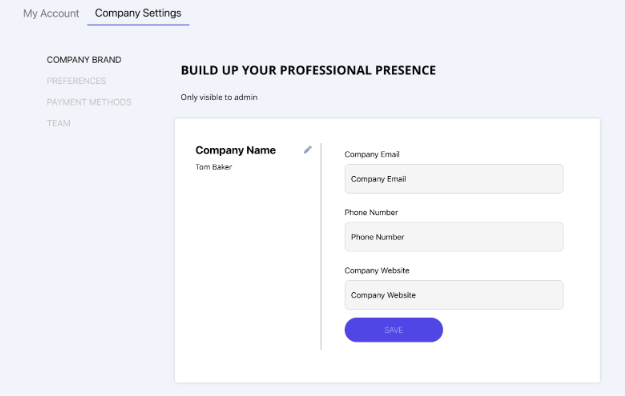
Company Brand Settings
In the Company Brand section, enter your company’s essential information, including the company name, email address, phone number, and website link. This information will be displayed on all contract and invoice templates, ensuring that your branding is consistent and professional. Any updates you make here will automatically reflect across these templates.
The Benefit
This feature saves you time by keeping your contract and invoice templates up-to-date automatically. Instead of updating each template individually whenever your contact information changes, you only need to update it once here, and all templates will sync with the new details. This streamlines your workflow and helps maintain a professional appearance for your business documents.
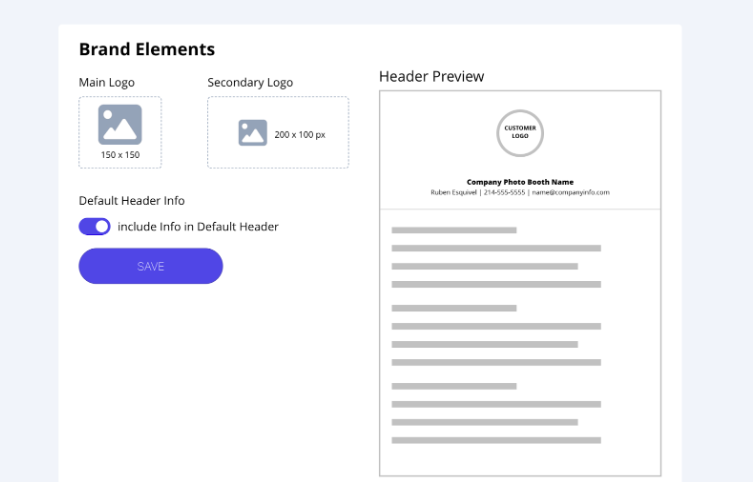
Brand Elements
This feature allows you to upload your main logo and a secondary logo (typically a rectangular version) to create a consistent brand presence across your documents and communications. Once uploaded, these logos will automatically appear on your contracts, invoices, and emails, giving a professional and cohesive look.
The Benefit
Having your logos automatically integrated into contracts, invoices, and emails saves time and ensures consistency in branding. If you ever need to update your logo, this feature is especially helpful, as the new logo will be applied across all existing templates without needing to update each one manually. This not only streamlines your workflow but also reinforces brand recognition with clients.
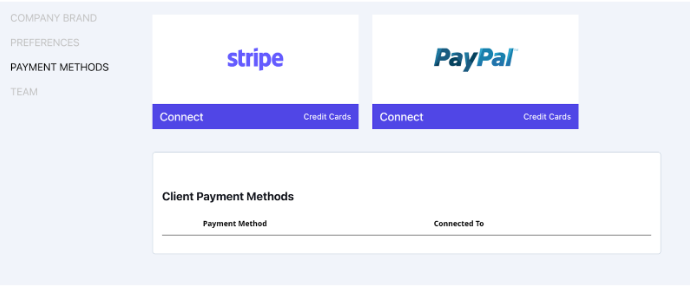
Payment Methods
In this section, you can connect your preferred payment gateways, Stripe or PayPal, to accept credit card payments from your customers directly through your platform. Simply click "Connect" under each gateway to link your accounts. Once connected, these options will appear on your invoice payment pages, providing your customers with an easy and secure way to make payments.
The Benefit
Integrating payment methods like Stripe and PayPal allows you to offer flexible payment options to your clients, improving their experience and potentially increasing booking rates. With these payment methods connected, payments are automatically processed and recorded, saving you time and reducing the need for manual tracking or follow-ups. This is especially beneficial for managing multiple transactions and ensuring secure, efficient payment processing across all your events.
Payment Settings Bullet Point List
Feature Highlights:
- Seamless Integration: Connect your preferred payment gateways, Stripe or PayPal, directly to your platform.
- Simple Setup: Just click "Connect" under each gateway to link your accounts with ease.
- Direct Customer Payments: Once connected, customers can pay invoices online using credit/debit cards or their PayPal account.
- Secure Transactions: Built-in security through trusted gateways ensures safe payment processing for you and your customers.
Key Benefits:
- Flexibility for Clients: Offering multiple payment options (Stripe and PayPal) improves customer convenience and satisfaction.
- Save Time: Payments are automatically processed and recorded, eliminating manual tracking or follow-ups.
- Boost Booking Rates: Easy online payment options can encourage more clients to book services with confidence.
- Scalable Solution: Manage multiple transactions across events seamlessly without added complexity.
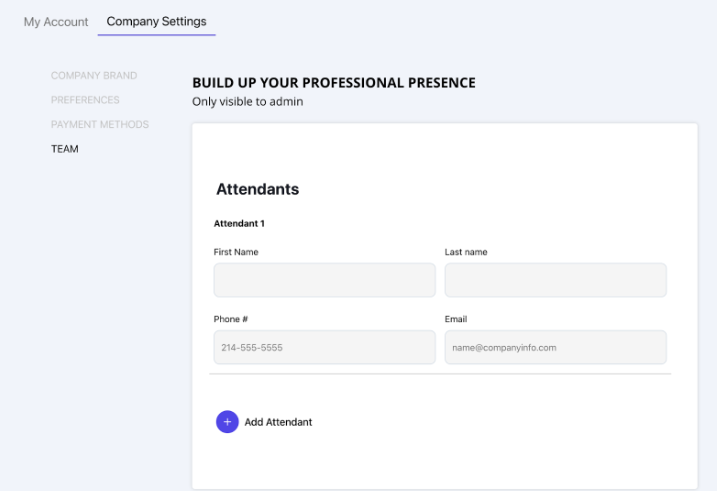
Team
Note: this feature still needs to be builtThis is where you add your team members, such as attendants or installers, who will be assigned to events. Here, you can input their names and contact details, like phone numbers and emails. Once team members are added, you’ll be able to assign them to specific events directly from the “Event Overview” page.
You can specify the number of attendants needed, set up reminders for them, and choose whether they’ll receive notifications via email or text, ensuring they have all necessary event details in advance.
The Benefit
This feature saves you time by automating the sharing of event details and reminders, so you don’t need to manually follow up with your attendants. Each assigned attendant will automatically receive important information, including the customer’s name, event address, contact details, and the event’s start and end times.
This ensures the installer knows exactly when to arrive for setup, which is especially important for time-sensitive events like weddings. The last thing a business owner wants is for an installer to be late, missing the window to set up a photo booth or other services in time for an important event.
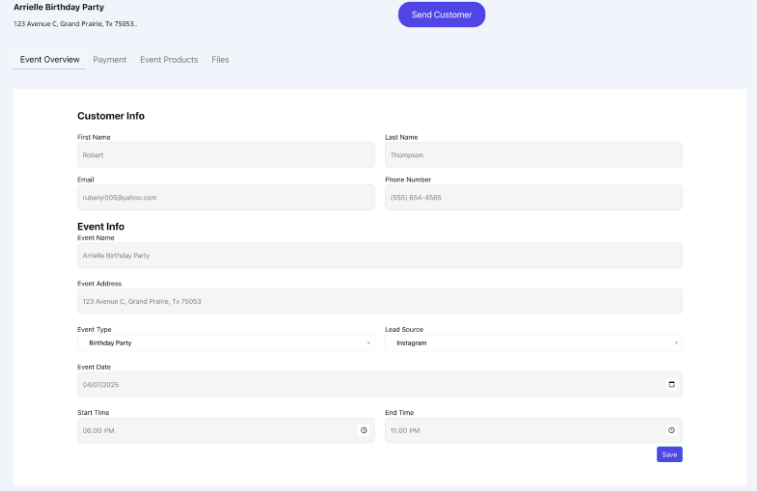
Brief description of the Event
Overview page. More details below.
The Event Overview page is the main hub for each event, displaying all essential details like customer information, event date, location, and timings. Once you’ve added attendants in the settings, this is where you can assign them to specific events. This page ensures your chosen attendants/installers are informed and prepared for each event, as all relevant details are centralized here.
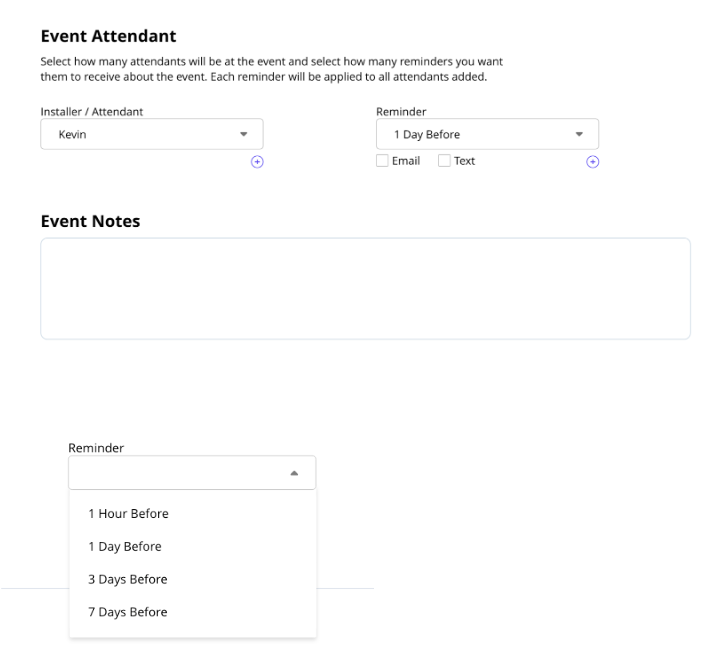
Event Attendant Section
(Bottom of Event Overview Page)
Feature Explanation
At the bottom of the Event Overview page, you can add multiple attendants or installers to the event. You can set up reminders for each of them, choosing whether they’ll get reminders by email or text and when (like 1 day before). Once added, they’ll automatically receive all the important event info—like the customer’s name, contact info, event address, and start and end times.
The Benefit
This feature saves you time by sending the information to your installers for you. This way, you don’t have to worry about making sure your attendants/installers have the event info—like where it’s located and when to be there. It’s one less thing to worry about and, most importantly, something you don’t have to think about.