Gallery Feature
Feature Explanation
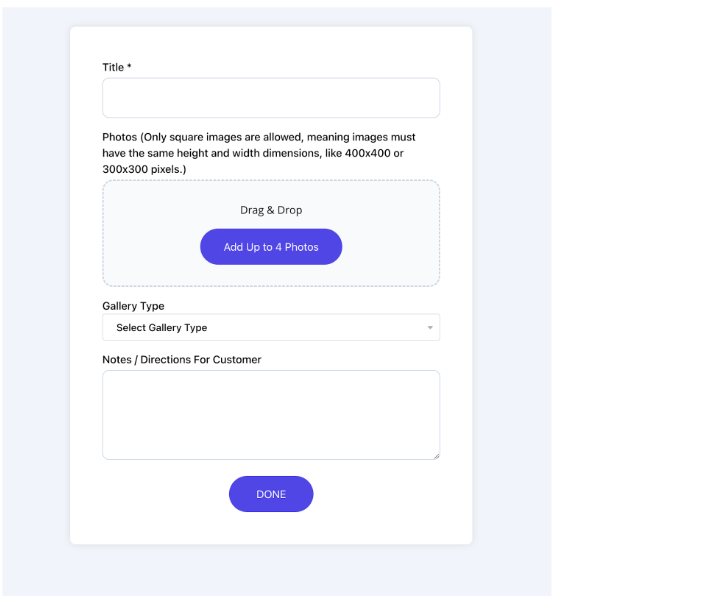
The Gallery feature allows users, such as photo booth owners, bounce house owners, and photographers, to create and share customizable galleries with their customers. Users can upload designs or images into organized gallery sets, each with up to four images and customizable descriptions. These galleries can be shared with customers either through a direct link or by embedding the gallery on their website using the provided HTML code.
Customers can browse through the gallery sets, view individual images, and leave notes or instructions directly within the gallery interface. The gallery also provides a streamlined way for customers to share their details (name, email, and phone number) and submit their selections. Upon submission, users receive an email notification with the customer’s information and selected gallery set, helping them stay informed and organized.
The gallery offers a Preview mode to simulate how it will appear to customers and a Publish option to generate the direct link and embedding code.
The Benefit
The Gallery feature streamlines the way users showcase their designs or products, providing a professional and interactive experience for their customers. By enabling customers to easily view, select, and submit details about specific gallery sets, this feature eliminates the need for back-and-forth communication, saving time and reducing errors.
With options to share galleries via a direct link or embedded code, users can cater to a wide range of customer needs, whether or not they have a website. The email notifications ensure that users never miss a customer selection, enhancing organization and customer satisfaction. Additionally, the ability to categorize and customize gallery sets improves usability, making it easier for customers to find what they’re looking for, which can lead to increased bookings and smoother operations.
Gallery Page Before Setup
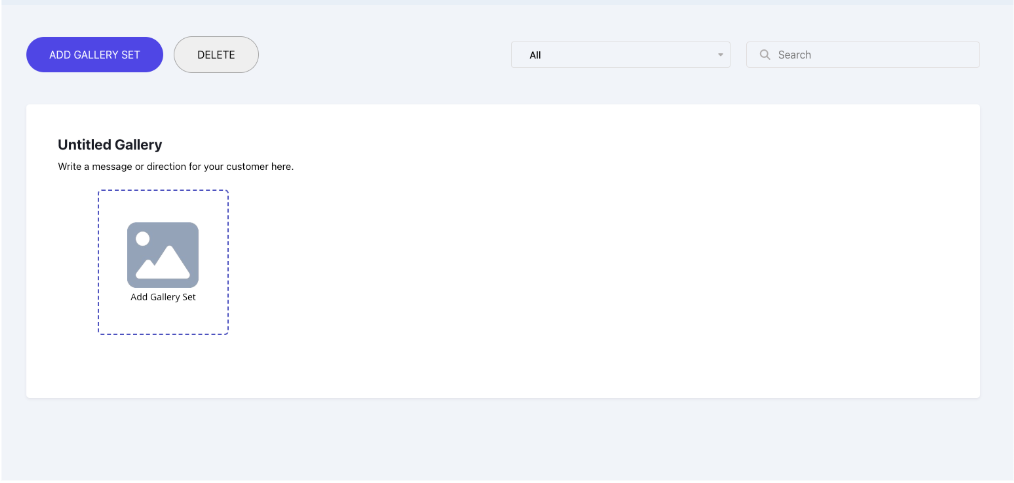
After Clicking any “Add Gallery Set” Button
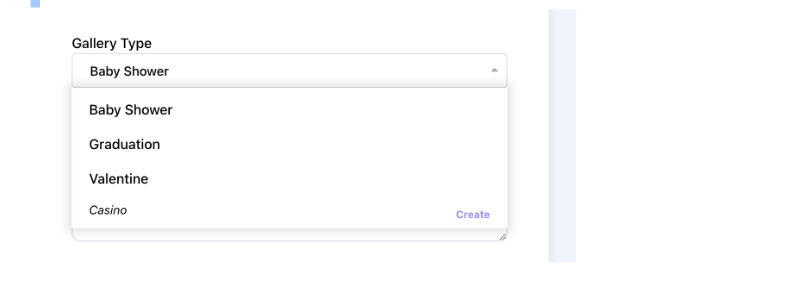
When you click on Gallery Type Dropdown Button
This is the part that shows the categories on the left hand side for customers
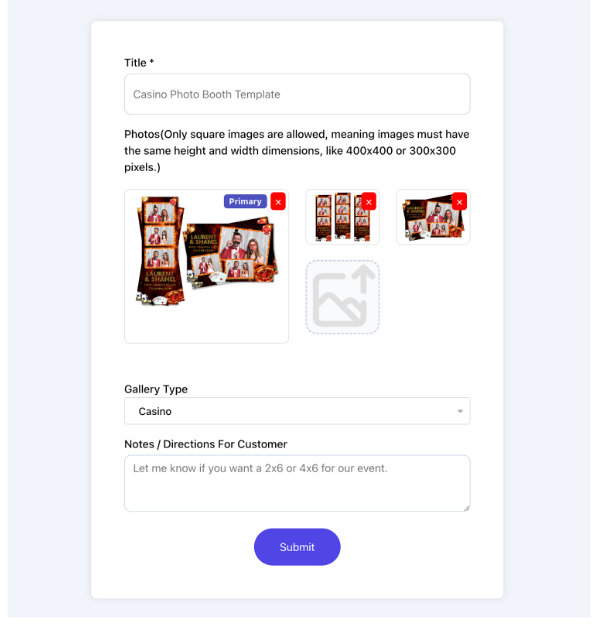
Example after you add photos and info
You can also adjust the images and pick which order you want them to be in.
Gallery Page After Setup Example
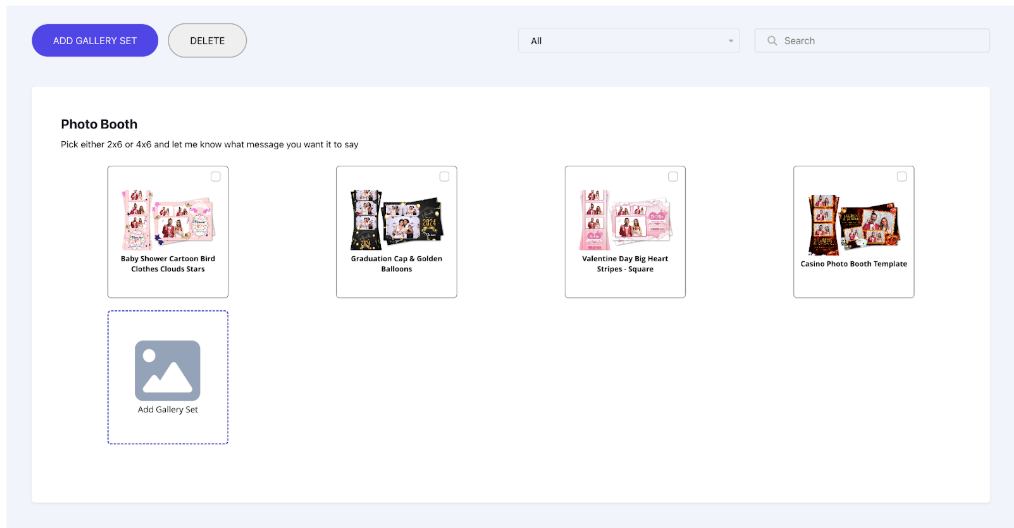
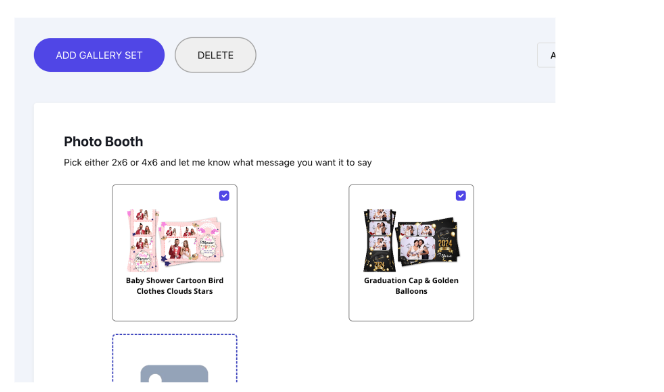
Deleting Gallery Sets
You can delete by clicking on the Check Mark Boxe(s) and then clicking on the “Delete” button
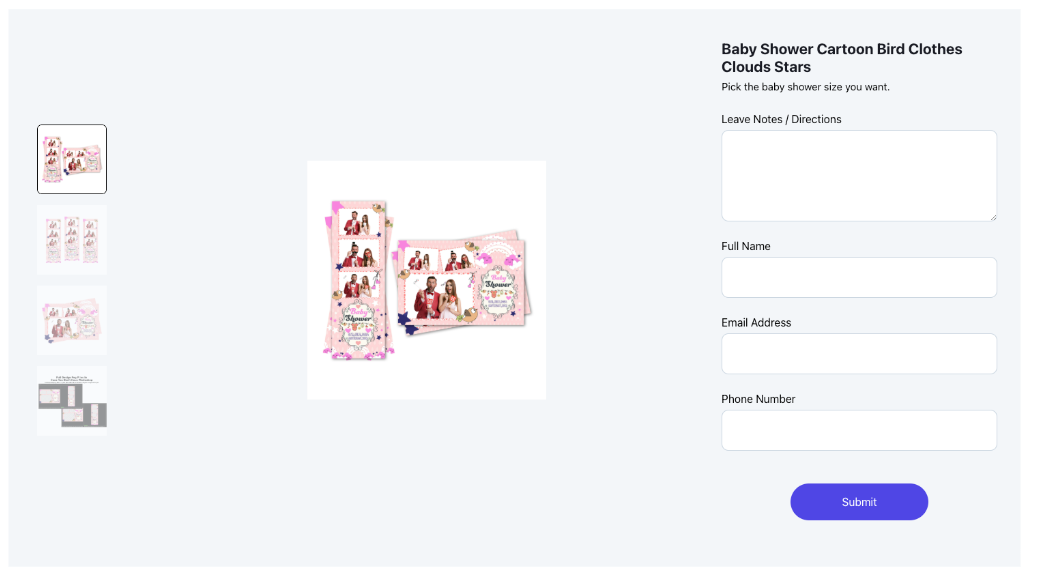
Gallery Set Page Viewed by Customer
This screenshot shows what the customer’s experience will look like when they click on a specific gallery set from the shared gallery.
- Image Viewer: The customer can view all images in the gallery set by clicking on the thumbnails on the left, which update the larger image in the center.
- Details Section: On the right, the customer can see the name and description of the gallery set, along with the option to leave notes or directions for the user.
- Customer Input Fields: The customer must provide their full name, email address, and phone number before clicking the “Submit” button.
- Submission Process: Upon submitting, the user will receive an email with the customer’s details and the gallery set they selected.